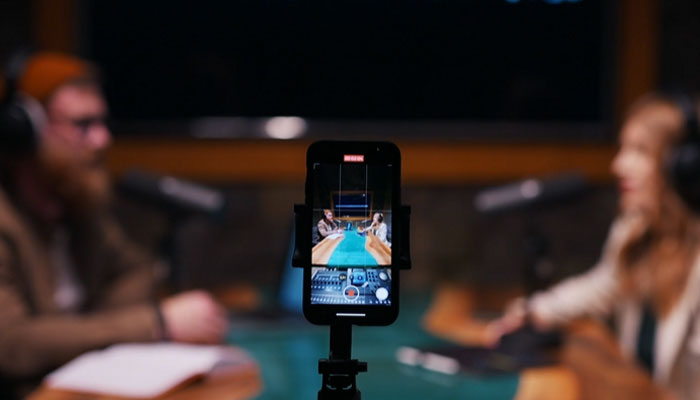
When it comes to your iPhone, you have a truly versatile device. The range and power of what can be done with one small device really is astonishing these days, which means it can sometimes be easy to take some features for granted.
Recording audio is one of those things. Your iPhone is a perfect device for capturing an audio recording! There are plenty of ways you can do it, loads you can achieve, and you can share everything you've recorded.
How to Record Audio on iPhone
Recording audio on an iPhone is very straightforward, which makes it ideal for being able to record anything anywhere - no lengthy set-up, just record audio any time you need to. You will need to use the built-in audio recorder which is the voice memos app. It is perfect whether you want to record personal notes, a lengthy interview, or even a podcast.
Firstly, unlock your iPhone and find the Voice Memos app. It is usually under Utilities.
If you can't locate it, pull down from the middle of your iPhone and do a search for voice memos. Your iPhone will then find it for you, and you can open it that way.
Once you have located it, click the icon and launch voice memos. This will open the main voice memos screen.
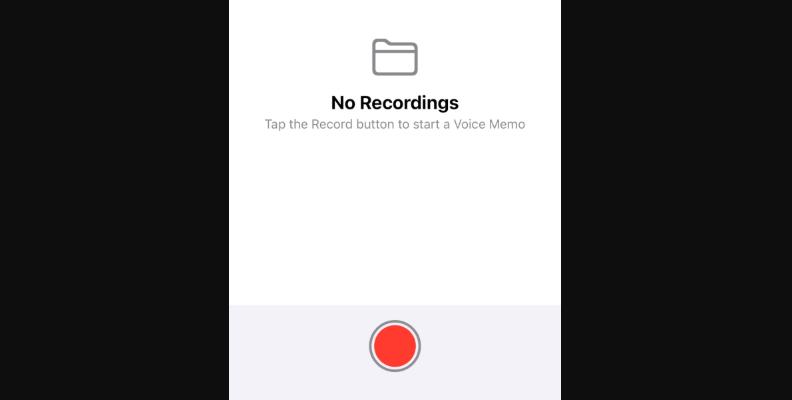
At the bottom of the voice memos app, you will see a big red button. Simply press on this to begin recording, and voice memos will automatically start.
When you are finished, press it again, and the recording will be stopped.
You will be able to tell that everything is working correctly because as you speak or record audio, you will be able to see an audio waveform above the record button.
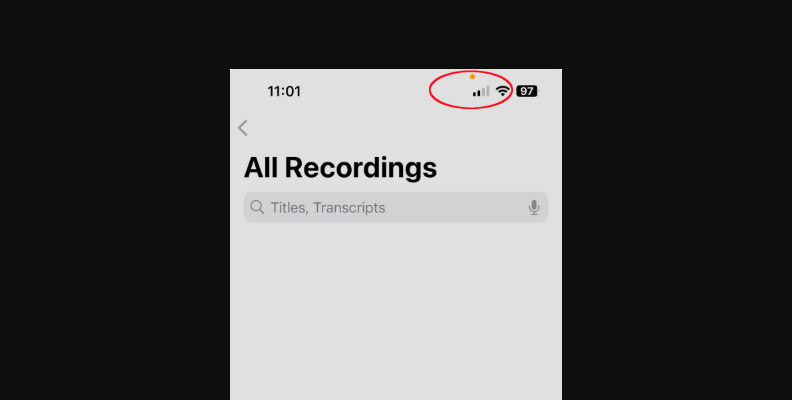
An orange dot appears in the top right corner of your iPhone's screen as well. You will find this up by the notch or dynamic island. This is small and quite easy to miss, but it indicates that the microphone is active.
If you find that the audio is too loud or too quiet, this will be visible with the waveform. If the waveform is smooth or barely moving, the recorded audio is too quiet. If it's completely full, it's too loud. Move the iPhone closer or further away from the audio source to adjust the volume.
To pause your recording, swipe up. This will expand the size of the audio waveform and also reveal the pause button. Click the button, and your recording will be paused.
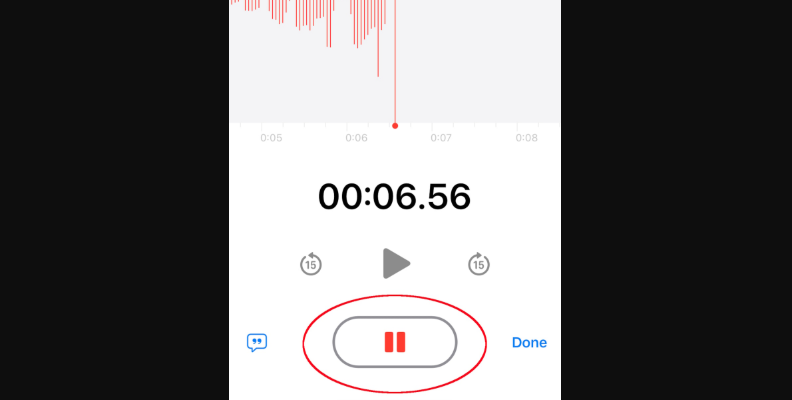
When you are ready to resume, click the Resume button, and voice memos will start recording audio again.
When you are finished, click Done, and the recording will stop.
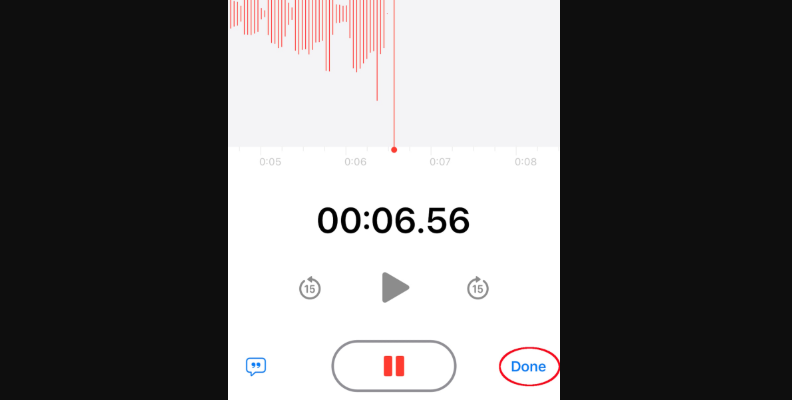
To begin recording a new note, simply press on the red record button again, and a new voice recording will automatically begin.
Saving and Naming Your File in the Voice Memos App
When you stop recording, the file is automatically saved to your iPhone. It will be given a default name, usually New Recording.
In order to change this, press on the default name. This will open the keyboard and allow you to rename the file to something a little more helpful. Press the return key, and the file will be renamed.
And that's it! It's really easy to record high-quality audio on your iPhone with the voice memos app, and it's a great grab-and-go method for recording quickly and easily.
How To Delete Audio Recorded on iPhone
At some point, you're going to want to delete the audio you have recorded.
Open the voice memos app. You will see a list of the recorded audio files you have made.
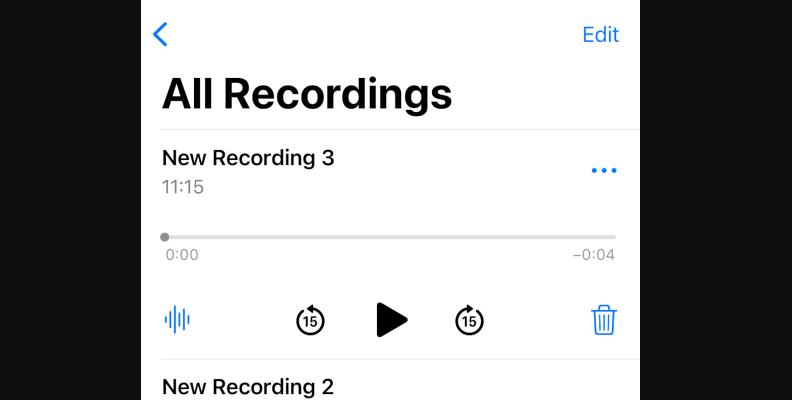
Press on the file you want to delete. You will see a trash can icon on the left-hand side of the recording. Simply press on that and the file is gone.
If you want to delete multiple files at once, click the Edit button at the top right-hand corner of the screen. You can then select multiple files at the same time.
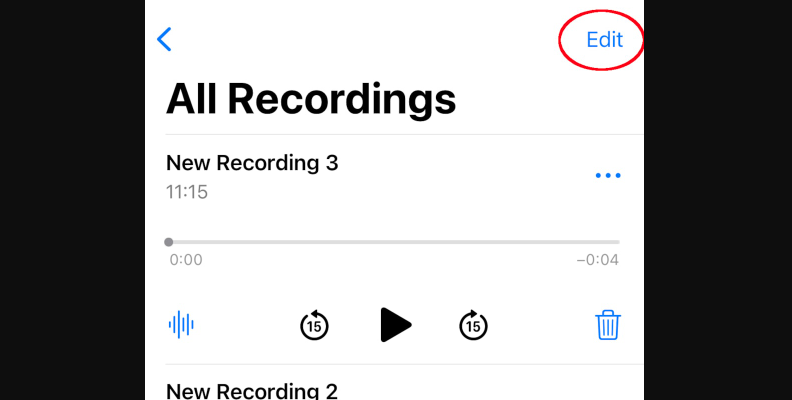
When you have selected all the files you want to delete, click the trash can icon at the bottom right-hand side of the voice memos app. The files will then be deleted.
All deleted voice memos are kept for 30 days by default. If you want to recover these recordings, you can go into the Recently Deleted folder.
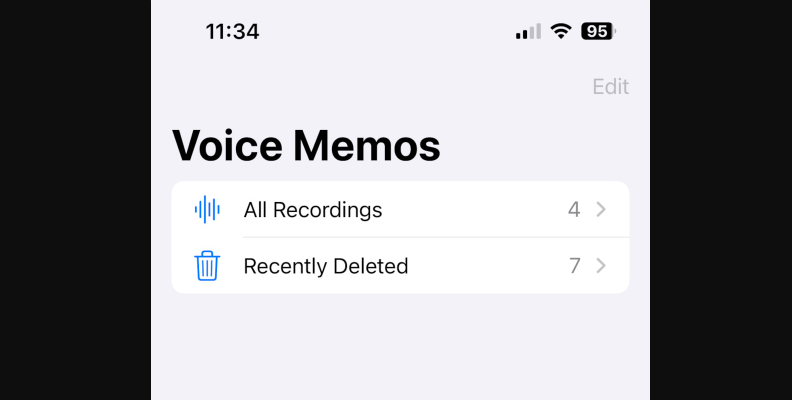
When there, press on the audio file you want to recover and then press Restore. The recording will then be put back into the main folder.
Best Ways to Improve Your Audio Quality Recorded on iPhone
There are a number of ways you can improve the audio quality of your recording, even using a tool as simple as the voice memos app.
CrumplePop Voice Enhance
Try Voice Enhance Now!
Instantly transform any voice recording into professional-quality sound with the power of AI. No internet access required- your audio stays private and secure. Toggle it on/off to hear the difference.
On-location Interview
Selfie-style Phone Audio
Zoom Call
Ridiculous Echo
Traffic Noise
Far from Mic
Untreated Room
Recording at Home
On-location Interview
If you do end up picking up stray sounds on your recording, there's not a lot you can do about it on your iPhone. However, CrumplePop provides a range of audio restoration plug-ins that can save recordings you might otherwise have thought unusable. The quality of the plug-ins is second to none, and their most recent offering is Voice Enhance.
Voice Enhance is a practicably relevant plug-in when it comes to achieving high-quality audio and improving the overall sound quality of any voice. If you record audio, even in a tool as simple as the voice memos app, it is absolutely invaluable.
Voice Enhance
Voice Enhance will take any voice recording and improve it - it's really as simple as that! The Voice Enhance plug-in is an AI-powered tool that just makes the sound quality radically better - everything sounds clearer, cleaner, and easier to listen to.
Muffled vocals will become clearer, the echo will be reduced, and background noise will be cut down.
The plug-in is available in VST3, AAX, and AU formats, so whatever operating system or DAW (digital audio workstation) you are using, you can be guaranteed compatibility.
Whatever issues you're having that need to be fixed, Voice Enhance can help.
External Microphone
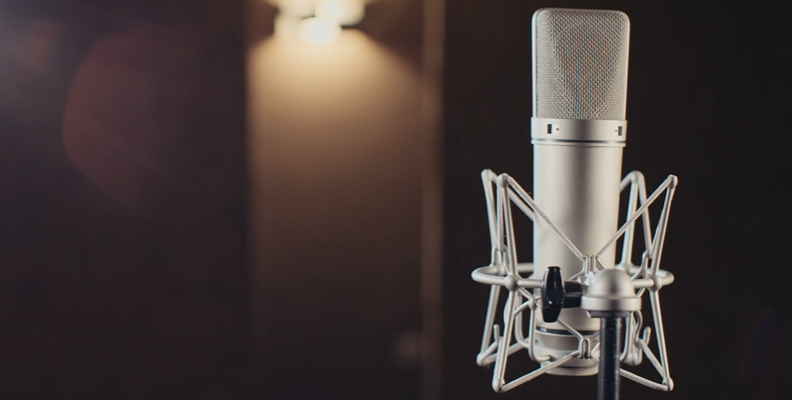
While the iPhone's built-in microphone produces good audio by the standards of a mobile device, the single best way to get better quality audio on your iPhone is to get an external microphone.
Even a very inexpensive external microphone will greatly improve the quality of your recording, so if you're planning to use the voice memos app regularly for recording, it will be more than worth your while to invest in one.
A small lavalier microphone will be ideal if you are out and about with your recording. They are very small, usually inexpensive, and will make a considerable difference to your ability to record good audio.
If you are going to be recording in an indoor, fixed location, investing in a desktop microphone will also be a worthwhile investment. It will allow all your recordings to be done in high quality and the sound quality will be noticeably superior.
Whichever one you choose, be sure that it suits the method you will be using for recording.
Microphone Placement
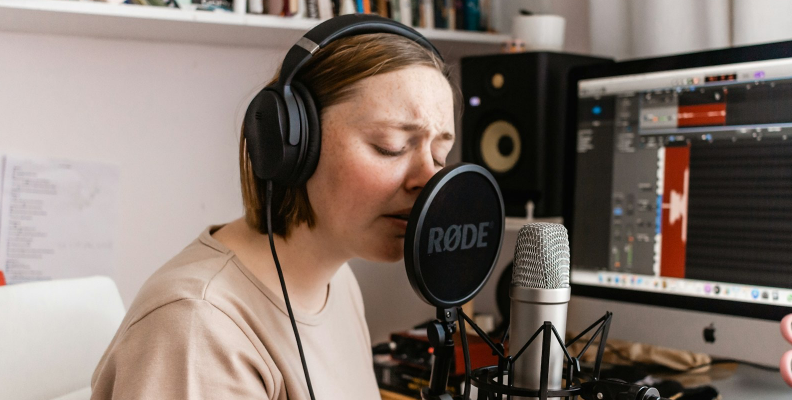
Speaking of microphones, one of the most important things to consider is microphone placement. It doesn't matter whether you're talking about the iPhone's built-in microphone or an external microphone - where it sits in relation to the person speaking can have a huge effect on the quality of the final recording.
Clipping
If you position the microphone too close to the person speaking, you will produce an audio recording that is too loud. If this happens, you will get "clipping" - part of the audio signal being cut off (or "clipped") because it's too loud for the equipment to handle. You may also pick up unwanted breath noises, throats being cleared, or plosives, sounds that cause the microphone to "pop."
If you record audio while someone is too far away, you will get the opposite effect - the recording level will be too quiet, and you might barely be able to hear the person.
Distance
Finding the correct distance will depend on the type of microphone you are using - a more sensitive microphone can be placed a little further away from the person speaking, for example. It's a good idea to experiment a little before you begin recording so you can ensure that your recording level is correct and that you are getting a good, clear signal that is easy to listen to.
Choose Your Environment Well
Where you record your audio can be just as important as the equipment you use and can have a profound effect on the end result. You need to choose somewhere that will allow you to capture just the audio that you want rather than anything else.
That means you want to ensure you record somewhere quiet, somewhere you aren't going to be disturbed, and somewhere with good acoustics.
Acoustics
Good acoustics means that you want to record in as small a room as possible to cut down on echo. The fewer windows there are, the better. This is because glass reflects sound, which can also lead to unwanted echo.
You also want to ensure you record somewhere with as little background noise as possible. Unless you are recording in a professional studio, the chances are your environment won't be perfect.
But ensuring you record somewhere with no background noise from A/C units, fridges, or any other electronic device will make your audio sound far better.
Outdoor Environment
If you're recording outside, you will have far less control of your audio environment, but there are still things you can do to improve the quality of your recording.
If you are using an external microphone, ensure you have a wind guard on it. This will cut down on unwanted wind sound and allow you to capture only the voices you want to record.
As much as possible, try to record away from sounds that are going to get picked up, such as traffic, aircraft, and other factors you won't be able to have control over. Once you've captured them on your recording, you might have a hard time getting rid of them. Which brings us to...
Test Recording
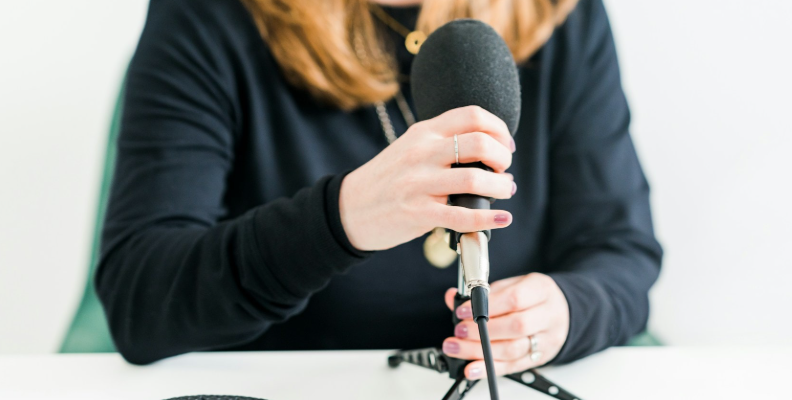
One of the most important steps anyone can take to record audio at the best quality possible, is to do a test recording. Test recordings are simple ways to ensure you're getting the best quality you can while also helping you eliminate anything that might cause issues with your recording.
There are two things to do with a test recording that can really benefit your audio.
Room Tone
Firstly, record the environment you are without saying anything, just for a few seconds. This is called recording the "room tone." It will help you hear things that you might not even be aware of and background sounds that you forget are even there but that the microphone will hear.
Hum
Hum from an A/C unit or fridge, distant traffic, even a door squeaking that you don't notice when you aren't focussing on it - recording room tone will help you identify these, and when you know what they are, you can take steps to eliminate them, or at least cut them down as much as possible.
While you won't necessarily be able to eliminate everything, being aware of your environment by listening to it in isolation will at least let you understand what you need to achieve.
Voice Recording
Secondly, you should do a test recording with your voice. This will help you understand your microphone placement so you know whether to adjust its position or not but it will also help you listen to yourself.
Recording audio to be listened back to isn't the same as conversational speaking. You need to ensure that your voice is interesting and engaging without going into "radio voice" and sounding like a cheesy radio DJ playing the hits from yesteryear.
Finding a Balance
Striking a good balance between keeping your voice interesting but not overplaying it will help whoever is listening to what you record stay engaged with what you are saying. And the best way to do that is to listen to yourself.
Embrace the Cringe!
And if you cringe at that, don't worry! Most people don't like hearing their own voices on recordings. But it's really important to try and get past that and listen to how you speak. You can also compare it to others - for example, if you're using your iPhone to record a podcast, listen to other podcasts and how people speak, then see if you're following the same patterns or sounding like you would engage listeners in the same way.
This might seem like a lot of information, but it just goes to show how much benefit there is from doing something as simple as a test recording.
How Do I Share an Audio Recording on iPhone?
When you have recorded whatever it is you need to record in voice memos, you might want to share it. Fortunately, iPhones make it easy to share your masterpiece with everyone and anyone!
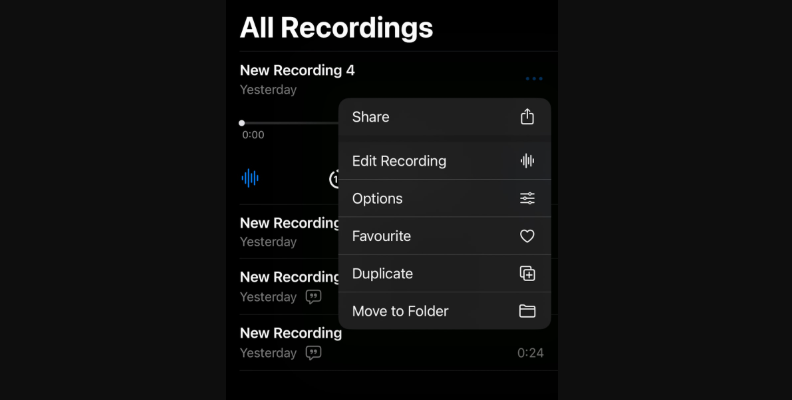
Firstly, go to the list of recordings you have made in voice memos. Press on the audio recording that you want to share, then press on the three dots at the top right-hand side. This will bring up the context menu for the file. Press on the Share option, which is the first one on the list.
Sharing
Your iPhone will then bring up a number of different methods of sharing. These will include Airdrop and Messages by default. Note that Airdropping to a nearby Apple device will only work when you have Bluetooth enabled on both devices.
Any other apps you have installed on your iPhone that can be used to share files, such as WhatsApp, mail applications, and so on, will also appear here. Simply select the one that you want to share the file to and your iPhone will take care of the rest.
FAQ
Can I Record Just the Audio on iPhone?
Yes, of course! iPhones have a great video camera, even on older models, but if you want to capture just the audio, then using the voice memos app is an ideal way to do this.
GarageBand
It is also worth mentioning that, if you own any Apple device, you will also have GarageBand installed as well. This is another way to record only audio on your iPhone and has additional tools to help you edit recordings you've made and work with your audio in other ways.
Whether you are using voice notes or GarageBand, you can definitely record audio only on your iPhone.
Can I Use iPhone as a Recorder?
Not only can you use it as a recorder, you can use it as an editor as well. While the editing tools in voice memos are comparatively limited when compared to even GarageBand, there is still some basic work you can undertake to let you edit recording files and improve your work.
Voice Memos Simple Editing Tools
Voice memos make it easy to do things such as trim the length of the track, adjust playback speed, and so forth.
You can even replace sections of audio by overwriting them in the middle of the recording if you have made mistakes. Simply position the playhead at the part of the audio waveform you want to overwrite, then press the Replace button. Your iPhone will then start recording from that point, overwriting the existing audio until you press stop.
No Undo in Voice Memos
However, be careful with this as you won't be able to go back and undo this, though you can save the modified track as a separate file, leaving the original alone.
So yes, you can use your iPhone as a recorder and you might find it's a much more flexible one than you imagined!
Conclusion
The iPhone is one of the best-regarded mobile phones in the world, and there's a good reason for that - it's a fantastic piece of technology. Being able to use it to record high quality audio is just one of the many uses you can put it to. And having the ability to make an audio recording anywhere, at any time, can be pretty invaluable.
Now, all you need to work out is what to record - imagination is your only limit!


