When making videos for broadcasting, you must meet certain criteria and conditions so that everyone can stream your video files correctly.
Today, you’ll learn how to create a broadcast-safe video file in DaVinci Resolve and deliver high-quality videos that all users will be able to enjoy.
Let’s dive in!
Broadcast Safe Definition
Broadcast safe means a video file project meeting the broadcast delivery prerequisites. Quality control (QC) requirements may vary depending on the broadcast company you’re delivering to. The delivery spec should be given in advance or received after reviewing the first master in the QC report to ensure your delivery is of the highest quality the first time.
To ensure your production is broadcast-safe, you can use tools to adjust colors before exporting your projects. Software like DaVinci Resolve offers features to help you achieve it. Another option is to use plug-in filters that will quickly apply the adjustments for broadcast simply by choosing a standard preset or customizing its settings.
How to Achieve Broadcast Safe Finishing in DaVinci Resolve

Step 1: Activate the Broadcast Safe Option
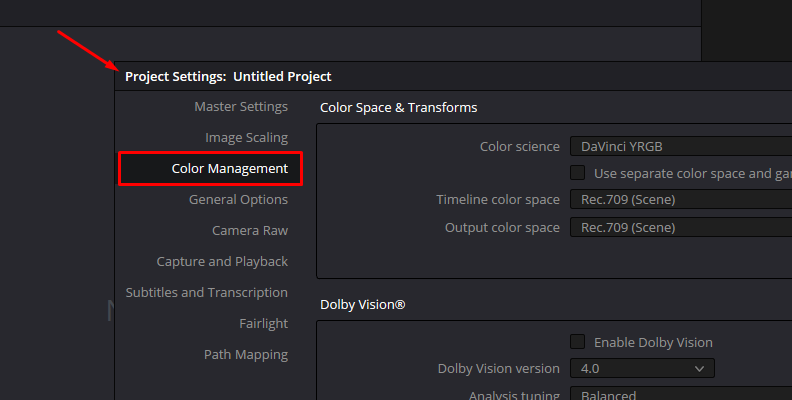
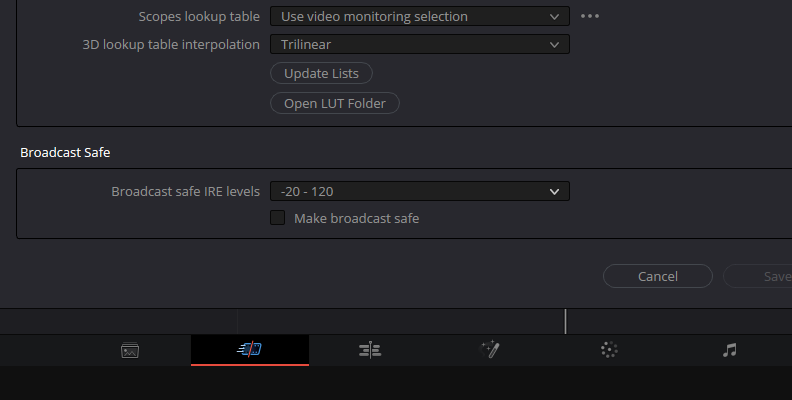
Open your project settings File > Project Settings (you can press Shift + 9) or click the gear icon in the bottom right corner to open the Project Setting window. Navigate to the Color Management tab and scroll to the bottom to find the Broadcast Safe section.
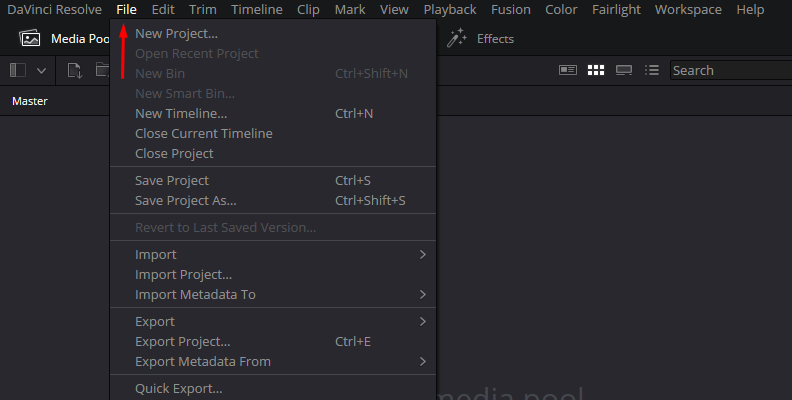

DaVinci Resolve offers three levels to select from, with 0-100 being the strictest. Set the broadcast-safe IRE levels to meet the requirements of the broadcast company. Before closing the window, check the “Make broadcast safe” check box and click Save.
Step 2: Display Broadcast Safe Exceptions
Go to the color tab and continue your color grading and correction workflow as usual. Ensure the scopes are visible to monitor your color work. DaVinci Resolve scopes are great, but if you are working with professional content and delivering it to broadcast, you may want to invest in external scopes and waveform monitors that provide real-time error logging.
Go to View and select Display broadcast safe exceptions. It will show the areas where color is outside the legal levels in the viewer.
Step 3: Make Your Project Broadcast Safe
DaVinci Resolve offers several ways to set your video project broadcast safe. The most common is to do it manually using the Curves tool and a DaVinci Resolve OFX plug-in.
Manual Method
Open the Hue VS Sat curve and manually adjust the color outside legal boundaries. Be ready to spend some time trying to fix it this way. Use the dropper tool to select the broadcast exceptions to adjust the color saturation.
Gamut Mapping Effect Method
Add a new Node and open the Effects library. Search for Gamut Mapping and drag it to the new node. Open the Effects settings panel and set the input Gamma and the Gamut Mapping method from the dropdown menu. Then, adjust the settings as needed to stay under broadcast safe values.
Step 4: Export
When you’re ready to export, go to the Deliver tab and adjust your export settings. Under Advanced Settings, you can set the data levels to video levels or other options. Generally, it’s best to leave the option in “Auto” and trust that DaVinci Resolve will render a broadcast-safe video and use video levels when needed.
Broadcast Safe in DaVinci Resolve with BCC Broadcast Safe
BCC Broadcast Safe is a plug-in that automatically ensures that all video projects are broadcast safe. It uses a soft knee approach to keep the color and luma levels safe for broadcasting.
The plug-in is simple to use with standard broadcast presets and custom mode to adjunct to non-standard requisites. Broadcast Safe is included in the Continuum plug-in suite along with other filters to enhance your broadcast projects in DaVinci Resolve.

Let’s learn how to quickly set up the plug-in to make your video broadcast safe. You can download the Continuum free trial to follow these steps.
Step 1: Apply BCC Broadcast Safe Plug-in
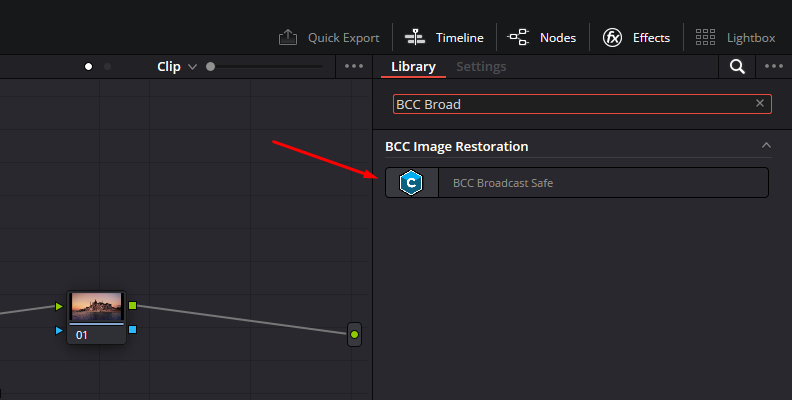
Create a new node in the color grid at the beginning of your sequence. Open the Effects library and search for BCC Image Restoration > BCC Broadcast Safe. Click and drag it to the node to apply it.
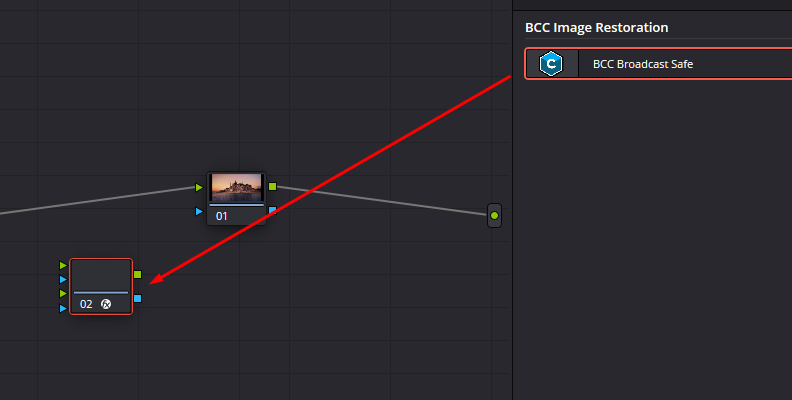
Open the Effects panel to access BCC Broadcast Safe settings.
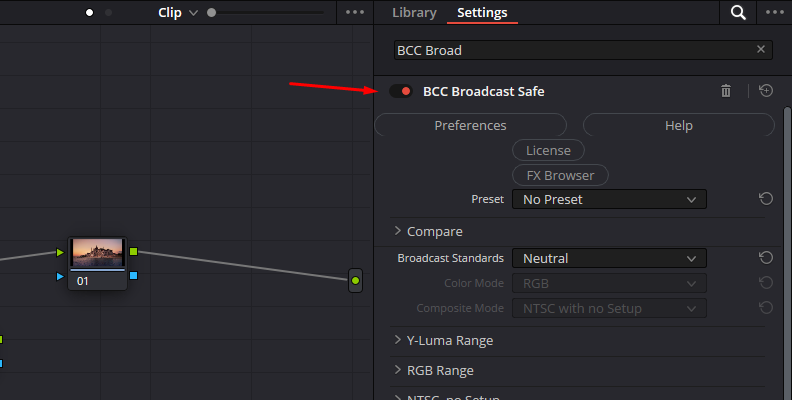
Step 2: BCC Broadcast Safe Configuration
The plug-in has Broadcast Standards presets to choose from and apply to your project to make them broadcast legal automatically. Save time by clicking the Broadcast Standards dropdown menu and picking an option. After selecting, the plug-in automatically adjusts the parameters to ensure a legal output.
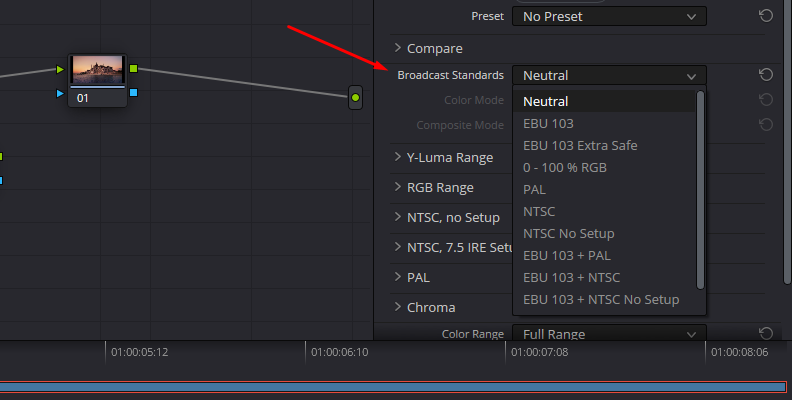
Some options are Neutral (default and the filter is not applied), EBU 103, EBU 103 Extra Safe, 0-100 % RGB, PAL, Custom, and more. The settings below this parameter will enable depending on your broadcast standard choice.
Usually, you won’t need to make extra adjustments, but you can if you need to. At the bottom of the effect’s settings, you can change the Color Range and Color Space.
View Mode is a useful tool for alternating between the Final Output and visualizing the areas of the image being modified by the filter. Change to Zebra Pattern or Clipped Pixel to see what parts are being identified with illegal levels by the filter.
Step 3: Custom Mode
When you are not required to deliver in standard broadcast or need specific and unique settings, use the Custom mode. It will allow you to fine-tune the parameter groups manually.
BCC Broadcast Safe allows you to save your custom settings as presets for that specific broadcast company and share them with collaborators.
In Custom mode, start by defining the Color Mode for the filter. Choose RGB, YRGB, Composite, Composite + RGB, or Chroma. Depending on your choice, the corresponding parameter group will enable to modify.
Now, render your video, and you're done!
Final Words
Ensuring a broadcast-safe finish to your videos will make them less likely to be rejected by the broadcast company and save you a lot of time in post-production. Tools like BCC Broadcast Safe make this step faster with the broadcast standards presets. Additionally, you can work with the BCC Videoscope filter to check your color levels during your color correction process.
Good luck!


