Knowing how to "connect" two clips in an engaging and entertaining way is a crucial video editing skill. More often than not, you'll need to use various transitions for your sequences rather than simply arranging the shots in a specific order.
This, of course, depends on the type of content you're editing. For film editing, you'll rarely use transitions, but when creating content for social media platforms, they add a lot of value in various ways and give an overall feeling that the content is of much higher production value.
There are countless transitions to choose from, but in this guide, we'll specifically cover the film roll transition, one of the nicest-looking and most interesting choices out there.
Without further ado, here's what you need to know.
What is a Film Roll Transition?
A film roll transition is a creative video editing effect that mimics the look and feel of an old-school film strip rolling through a projector. It’s a fun way to transition between scenes, giving your video a dynamic, retro vibe. You’ll see one clip “roll away” off the screen, like a piece of film being moved out of the reel, revealing the next clip underneath.
This type of transition adds a lot of movement and energy to your project, so it’s great for music videos, vlogs, or any project where you want to grab attention or add a vintage touch. The effect often includes extra details like light flares, film scratches, or flickering to make it look even more like authentic analog film.
You can create this transition using video editing software like Adobe Premiere Pro or Final Cut Pro. Many of these programs offer preset effects or plug-ins to make it easy, and you can tweak things like speed, direction, or overall style to fit the mood of your video.
Film roll transitions are super versatile, but it’s best not to overdo them. Use them thoughtfully to keep your video feeling polished rather than distracting. When done right, they can make your work feel fresh, creative, and full of personality.
How to Create a Film Roll Transition in Premiere Pro

Premiere Pro offers various built-in tools that allow you to create many different transitions and effects for your videos. It also has pre-built effects that you can use.
As one of the most versatile video editing programs out there, you can take different approaches to creating a film roll transition for your video file.
This is how we would do it:
Create a New Project and Import Your Media Assets
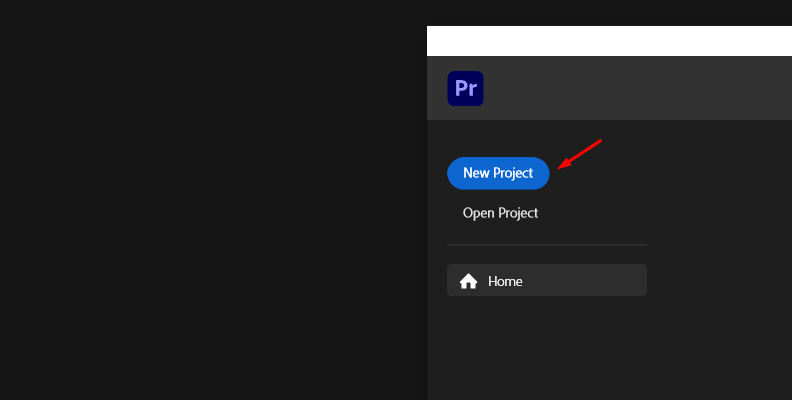
First, launch Premiere Pro and create a new project.
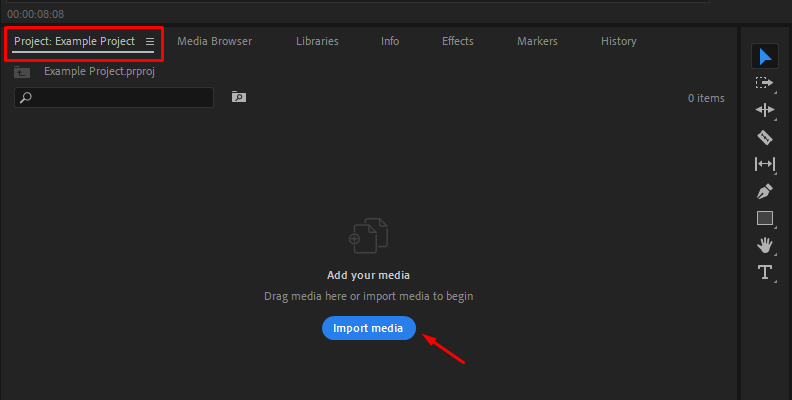
Import the footage you want to use in your project. Then, place the clips to which you want to apply the transition on the timeline area and create a sequence.
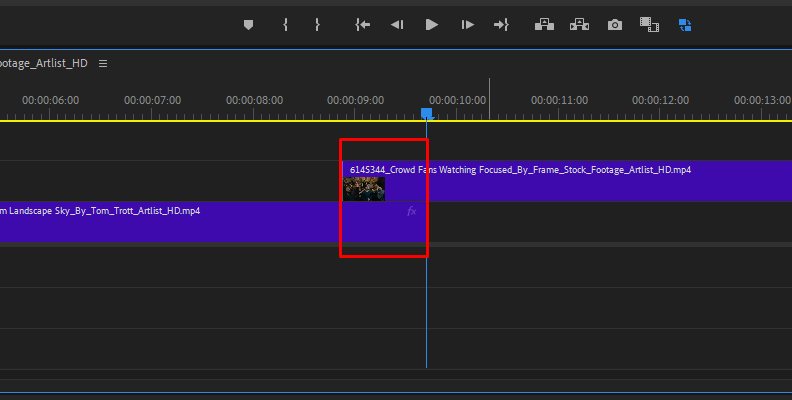
Make sure the frames overlap slightly, as this is where the transition will happen. Adjust the timing of the overlap to determine the length of the transition.
Create the Base of the Rolling Effect
You can create the rolling motion using the Transform effect. To do this:
Go to the Effects panel and search for "Transform."
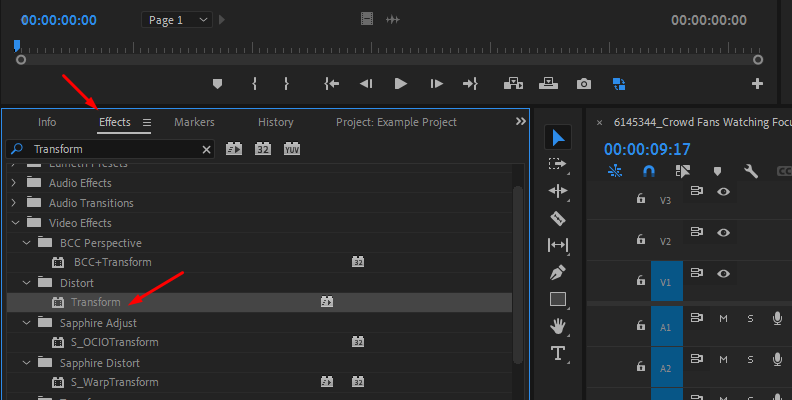
Drag the Transform effect onto the first clip.
Now, you’ll create the rolling motion:
Select the first clip, then go to the Effect Controls panel.
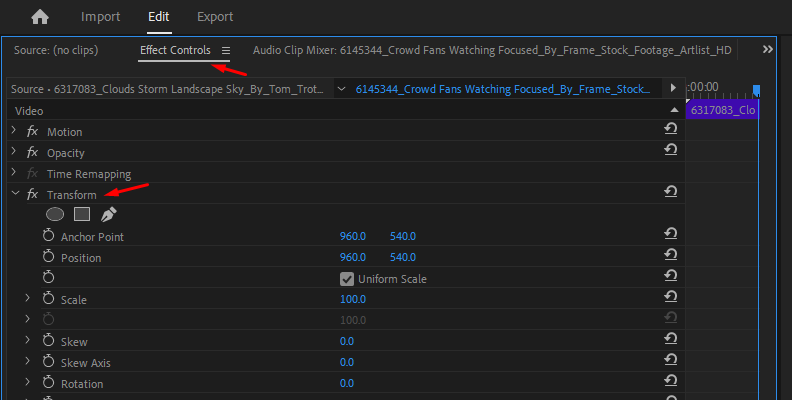
Under Transform, adjust the Position keyframes. Start by setting a keyframe at the beginning of the clip, with the position showing the clip in its normal state.
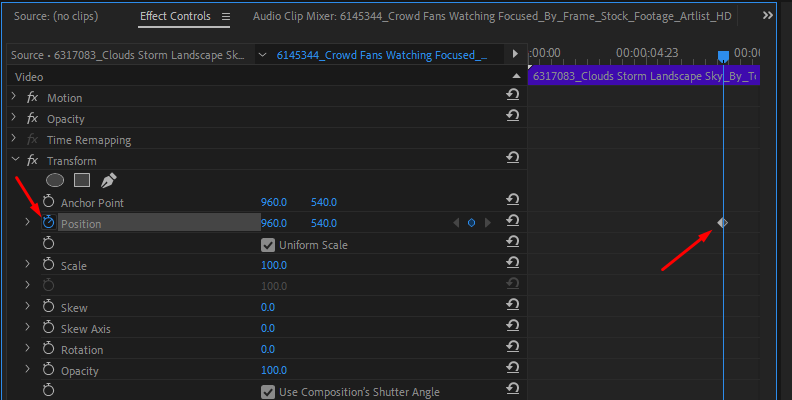
Add a second keyframe where the clip rolls out of the frame, either vertically or horizontally, depending on the direction you want the roll to go.
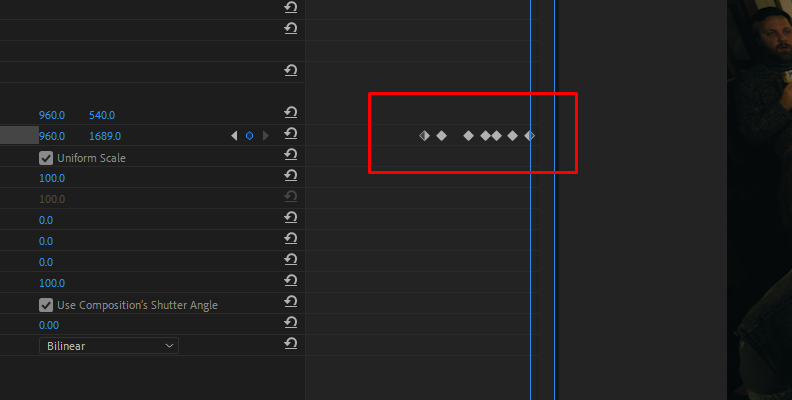
Repeat this process with the second clip, animating its entry to roll into the frame.
Add Motion Blur
To make the transition smoother, enable motion blur:
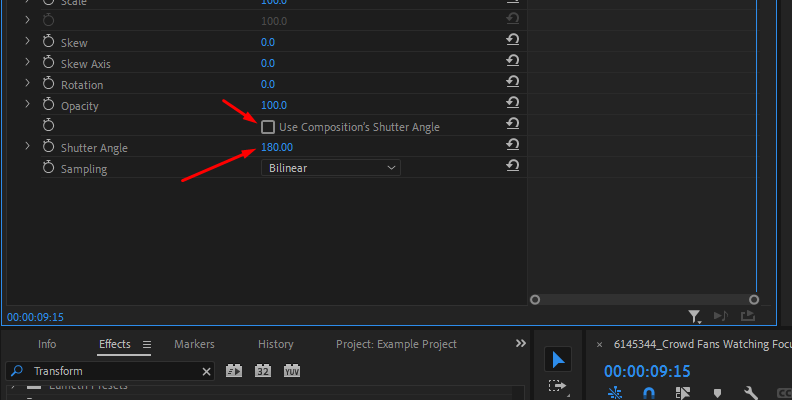
In the Transform settings, uncheck Use Composition’s Shutter Angle and set the Shutter Angle to around 180°. This adds a natural blur to the rolling motion.
Enhance the Transition With Additional Effects
To give the transition a more vintage film look:
- Add other effects into the combination that simulate things such as Film Damage or Light Leaks to further enhance the transition.
- You can also overlay a film strip PNG or video to enhance the aesthetic. To do this, download an image from the internet that matches your idea and place it above your clips on the timeline. Reduce the opacity and/or blending mode to make it more realistic, and you're done!
Create a Film Roll Transition With BCC+ Film Roll

Though Premiere Pro offers a lot of control over its built-in tools and effects, sometimes when it comes to completing more complex tasks and creating transitions such as the film roll transition, there are better choices out there.
It's very important to ensure you're making the right choice when choosing the tool for your job, as it can be the difference between saving a lot of time and often funds as well.
In this section, we'll show you how much easier it is to apply a film roll transition using the BCC+ Film Roll effect, which is part of the Continuum Creator Pack by Boris FX.
Before we get started, you should know that Continuum by Boris FX is compatible with all popular editing programs so you can download a free trial of the product and try it in your preferred working environment before deciding whether or not you want to purchase it.
Continuum is a pack that contains hundreds of different presets, transitions, filters, tools, and everything else you need to make your footage look cinematic and professional.
With that said, here's how to use it in Premiere for this specific task.
Create a Timeline/Sequence
Just like in the previous section, the first step is to create a new project and import the clips you want to work on. After importing, you need to drag and drop the clips from the "Project" tab onto the timeline area. This will create a sequence that you can now work on.
Apply the BCC+ Film Roll Effect to Your Clip
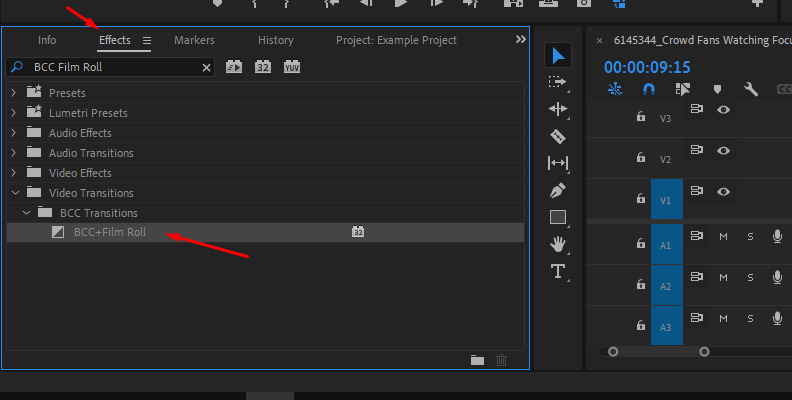
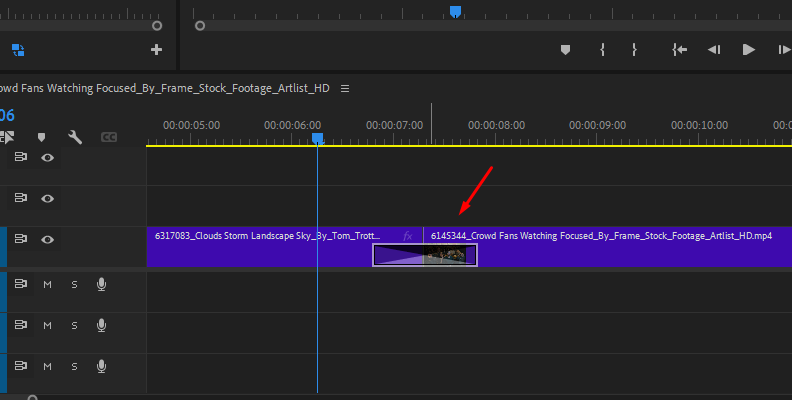
Once you have the clips laid out on the timeline in the order you want them, the next step is to locate the BCC+ Film Roll effect from the "Effects" tab and drag and drop it over the end of the first clip and the beginning of the second one.
Tweak and Modify if Needed
Once you apply the effect to your clips, you can immediately play the two shots and notice the transition. It works right away and without any further modifications needed.
However, if your project demands specific changes, you can access the "Effect Controls" panel and make any adjustments required. Just make sure to click on the transition itself before accessing Effect Controls. There are tons of customizable settings available from speed to dust and scratches to gate weave and flicker options and more.
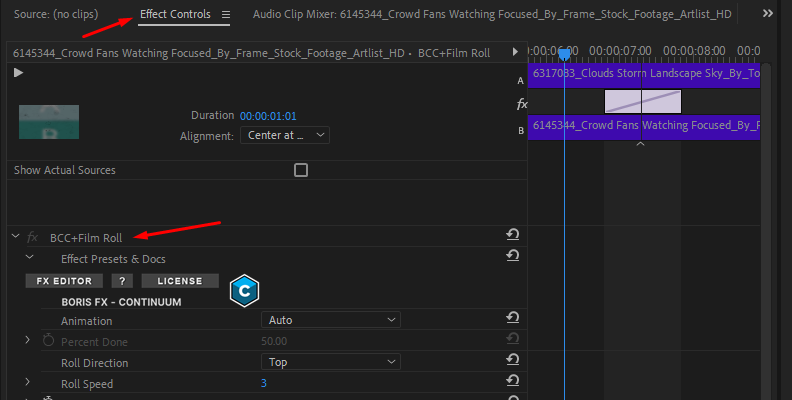
Once again, for more information on what the various settings and parameters do, take a look at the official BCC+ Film Roll effect webpage.
Final Words
That covers everything you need to know about the film roll transition in Premiere Pro.
Hopefully, knowing how to create one yourself will help you with all your future projects, as this is a widely used effect and applicable to a variety of projects.
We thank you for reading and wish you the best of luck!


