


The vignette effect is one of the most popular and versatile visual techniques used in both amateur and professional projects. The effect helps draw the viewer’s attention to the subject by subtly darkening or blurring the edges of the frame. However, it can also be used for other purposes, which we'll cover further in this guide.
Whether you are working on a cinematic short film, a professional documentary, or a YouTube or Instagram video, adding a vignette can enhance the composition and overall impact of your footage in many different ways.
Adobe Premiere Pro, as one of the most versatile editing tools, offers multiple approaches to creating and customizing a vignette effect, making it easy for editors of all levels.
In this guide, we'll help you understand how a vignette works, what are the use cases of this effect, and most importantly, how to create it yourself using Premiere's built-in tools and a super-helpful plug-in found in Continuum by Boris FX.
Let's get right into it!
What is a Vignette Effect?
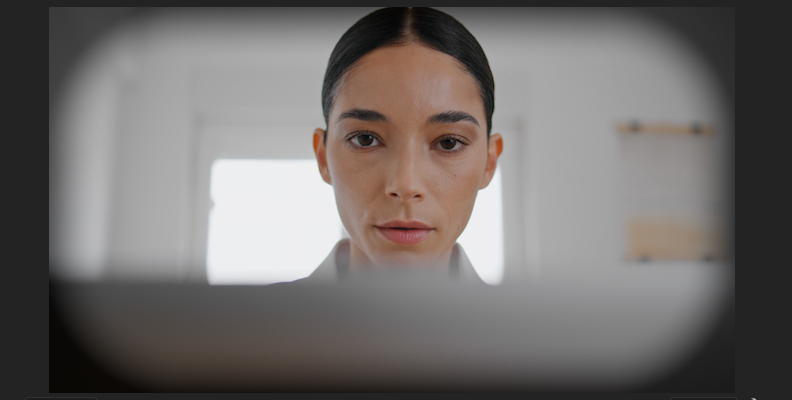
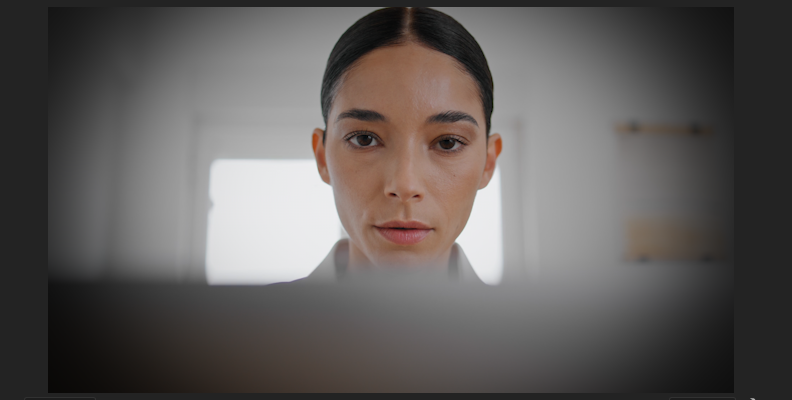
A vignette effect is a visual treatment applied to videos, images, and video games, where the edges of the frame gradually darken, blur, or fade while keeping the center relatively unaffected.
This effect is commonly used to create a sense of depth, add a cinematic touch, or guide the audience’s focus to a specific area of the frame.
Vignettes can be subtle and natural-looking, making them barely noticeable yet effective, or they can be more dramatic and stylized, evoking a strong emotional or artistic response. The level of intensity depends on the desired impact of the scene.
In addition to simple darkening, vignettes can also incorporate color grading, soft focus, or radial blur to further enhance the effect.
Some filmmakers use warm or cool tints to alter the mood of the vignette, while others experiment with varying levels of opacity to create different visual styles.
The effect can be created through multiple methods, such as adjusting the exposure, applying a mask, using blending modes, or utilizing specialized plug-ins that offer greater control over shape, feathering, and intensity.
What Are the Most Common Use Cases for the Vignette Effect?
Focus on the Subject
Vignettes are widely used across different genres and styles of filmmaking due to their versatility and impact on visual storytelling. One of the most common uses is to create a cinematic look by subtly darkening the edges of the frame, which enhances the visual appeal and mood of a scene. This effect helps to isolate the subject and draw the viewer's attention toward the focal point, making it particularly useful in dramatic and narrative-driven films where emphasis on specific characters or objects is crucial.
Enhance Lighting
In addition to creating a cinematic feel, vignettes can be used to correct or enhance lighting conditions. Sometimes, footage may appear too flat or lack contrast, and a vignette can help provide more depth by subtly framing the subject in a way that mimics natural light falloff. This is often seen in low-light cinematography or when shooting against bright backgrounds where some additional contrast is needed to balance the scene.
Setting the Mood
Another important application of the vignette effect is in evoking emotion. By carefully adjusting the softness, intensity, and color of the vignette, editors can set the mood of a scene. For example, a dark and heavy vignette might be used to create a sense of isolation, fear, or tension, making it ideal for thriller or horror films. On the other hand, a soft, warm-toned vignette can be applied in romantic or nostalgic scenes to create an inviting and sentimental atmosphere.
Removing Distractions
Vignettes are also commonly used in documentary filmmaking to create a more intimate feel, especially during interviews. By subtly darkening the edges around a subject, editors can naturally separate the person from the background, reducing distractions and ensuring that the viewer's focus remains on the speaker. This technique is especially useful when filming in uncontrolled environments where the background may be cluttered or visually unappealing.
Adding a Professional Look
In commercial and promotional videos, vignettes contribute to a polished and professional appearance. Many brands use subtle vignettes in advertisements and product showcases to ensure the viewer's eyes remain on the product. This is particularly beneficial in fashion, technology, and luxury product videos, where a sleek, modern look is desired. Additionally, vignettes can enhance the perception of depth and texture in a scene, making products or subjects appear more visually striking.
Recreating Vintage Cameras
Another creative use of vignettes is in replicating vintage camera aesthetics. Many older lenses produced a natural vignette due to their optical design, and filmmakers sometimes recreate this effect to evoke nostalgia or authenticity.
This is commonly used in period films, music videos, or artistic projects that aim to capture a retro aesthetic.
Overall, vignettes serve both practical and artistic purposes, enhancing the composition, directing focus, setting mood, and adding a stylistic touch to various types of visual content. Whether used subtly or dramatically, mastering the vignette effect can significantly elevate the storytelling and aesthetic quality of a video project.
How to Create Vignettes with Adobe Premiere Pro in 2025

Adobe Premiere Pro provides multiple built-in methods for adding a vignette effect, making it accessible for both beginners and advanced users.
The easiest way to create a vignette in Premiere Pro is through the Lumetri Color panel. Here’s how you can do it, step-by-step:
- Open Adobe Premiere Pro and import your video footage into the timeline.

- Navigate to the "Color" workspace by clicking on "Window" and selecting "Lumetri Color."

- In the Lumetri Color panel, go to the "Vignette" section.
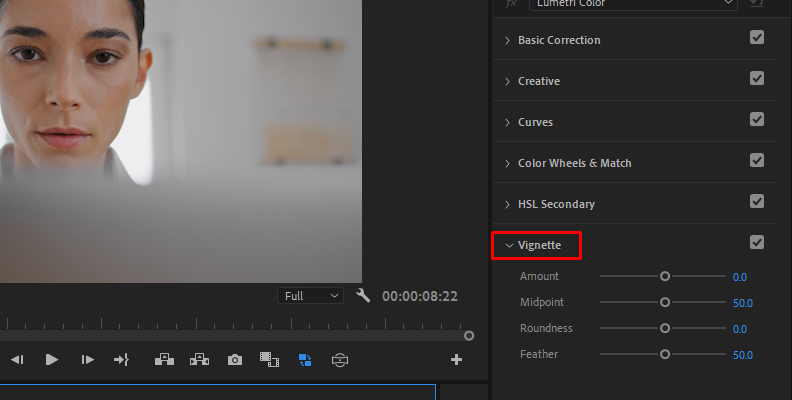
- Adjust the "Amount" slider to control the intensity of the vignette. A negative value darkens the edges, while a positive value brightens them.
Use the "Midpoint" slider to control how far the vignette reaches into the frame.
Adjust the "Roundness" slider to modify the shape of the vignette, making it look more like a circle effect or rectangular, based on your needs.
Use the "Feather" slider to decrease or increase the feather outer edge for the vignette Premiere Pro effect you're creating, which makes the effect's shape look more "blended in" or more "noticeable." Once again, this is a creator's preference.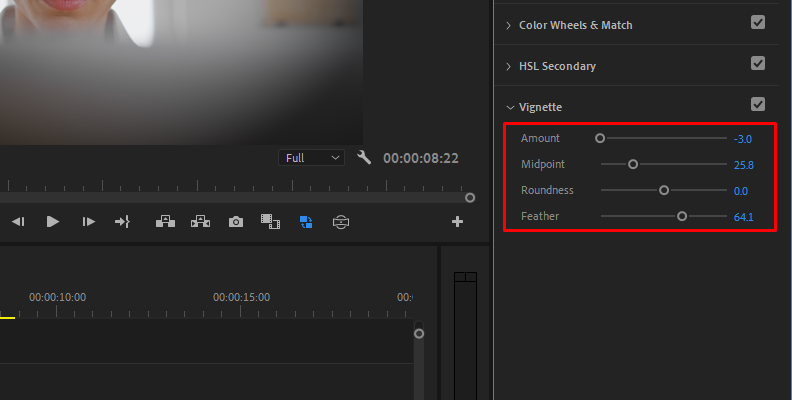
- Fine-tune the settings until you achieve the desired look by adjusting other parameters for your footage in Premiere Pro, such as adding a contrast effect, adjusting brightness and hue values, radius and center parameters, and more, all depending on your goal for the specific shot you're working on.
 You can also create a vignette effect using the circle tool for a mask in Premiere Pro, but we believe this method is much easier and more user-friendly.
Add Vignette in Premiere Pro With Continuum BCC+ Vignette
If you want to know how to add vignette in Premiere Pro in the quickest and most efficient way, we suggest following the steps in this section.
For this method, you'll need to have Continuum installed for your host software of choice, which in this case is Premiere. Continuum by Boris FX features hundreds of tools, filters, presets, transitions, and effects that you can use to take your video editing to a whole different level.
Continuum has a free version available that you can download and use as a way to try out all the tools and options available in the pack. You will have full functionality, but the content will be watermarked until you purchase a license.
With that said, once you have Continuum for Premiere Pro installed, here are the steps you need to follow:
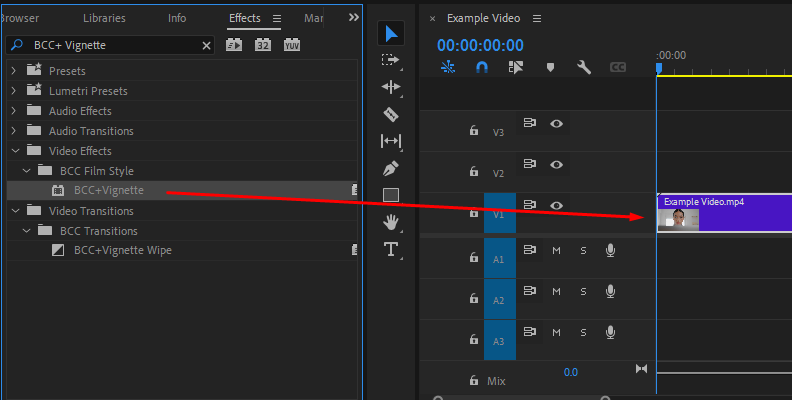
- Open Premiere Pro and add your video to the timeline.
- Navigate to the "Effects" panel and search for "BCC+ Vignette."
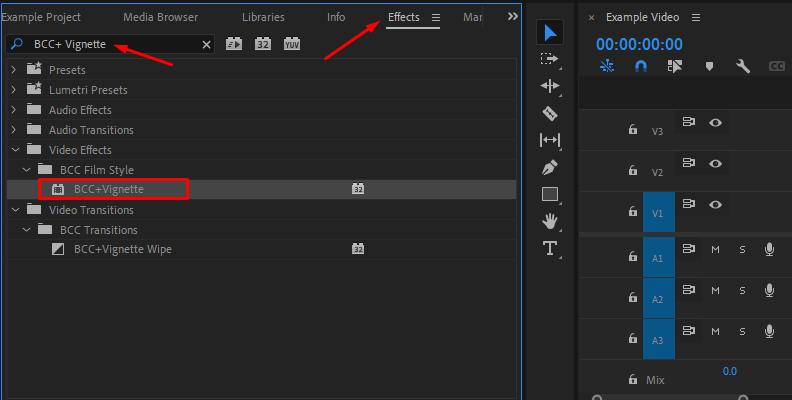
- Drag and drop the effect onto your video clip.
- Open the "Effect Controls" panel and find the BCC+ Vignette settings.
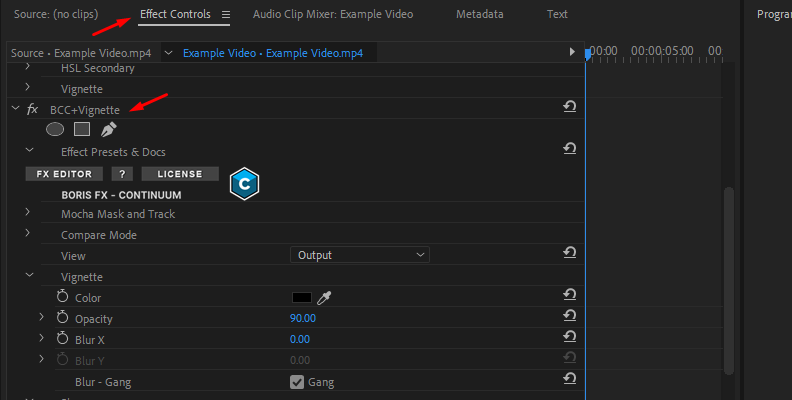 From here, you can do all sorts of customizations while previewing the effect on the right from the "Program" monitor panel.
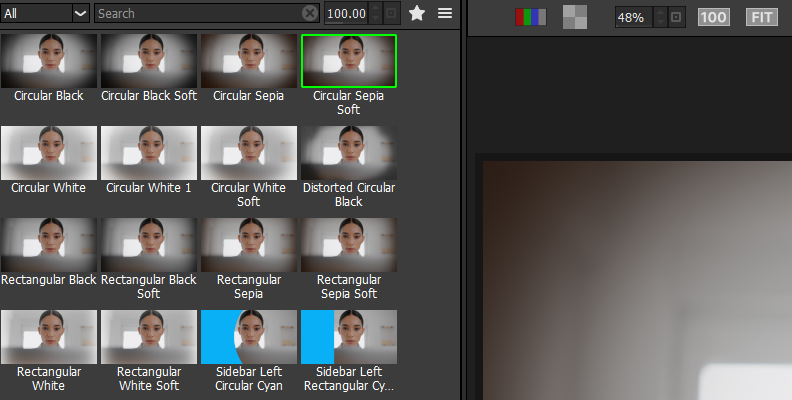
 - You can also click the "FX EDITOR" button and choose a Premiere Pro vignette template to customize from the many offered, as shown in the image below.
You can make the following changes to your video/image with just a click of a button when using Continuum effects, such as the BCC+ Vignette.
Before:
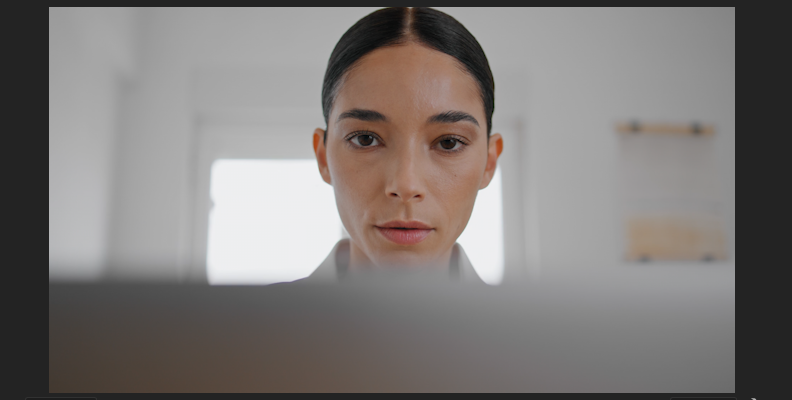
After:
Final Words
That concludes our guide for creating a Premiere Pro vignette effect and adding it to your video or image, as well as an explanation of all its possible use cases both in videography and photography.
Hopefully, this will help you with all your future projects.
Thanks for reading and best of luck with all your upcoming work.


