DaVinci Resolve is one of the best-known pieces of video editing software available today. There's a good reason for that - it's absolutely great at what it does.
Understanding its core functions is important and will help you get the best from the software. And one of the most important things you learn is the DaVinci Resolve export video settings.
How to Export Video from DaVinci Resolve
There are a few different ways you can export videos from DaVinci Resolve.
Quick Export
If you're looking to export video for social media such as YouTube, Twitter/X, or other platforms, then the DaVinci Resolve Quick Export is the way to go.
Even if you just want a quick, standard export of an H.264 file and don't want to mess about with too many settings, this will stand you in good stead.
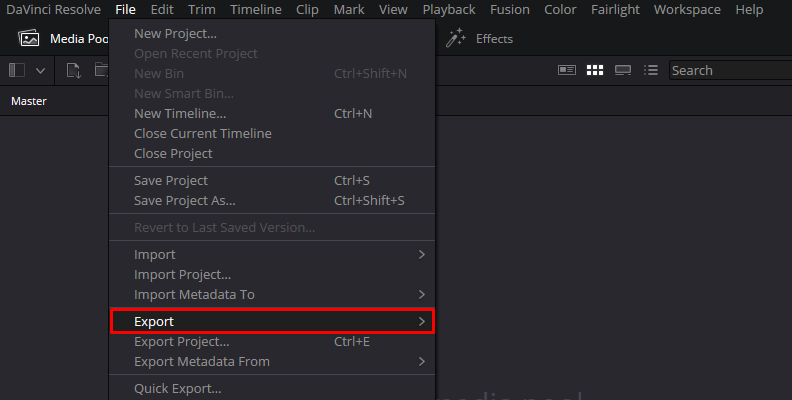
Firstly, go to the File menu, open the File drop-down menu, and select Quick Export.
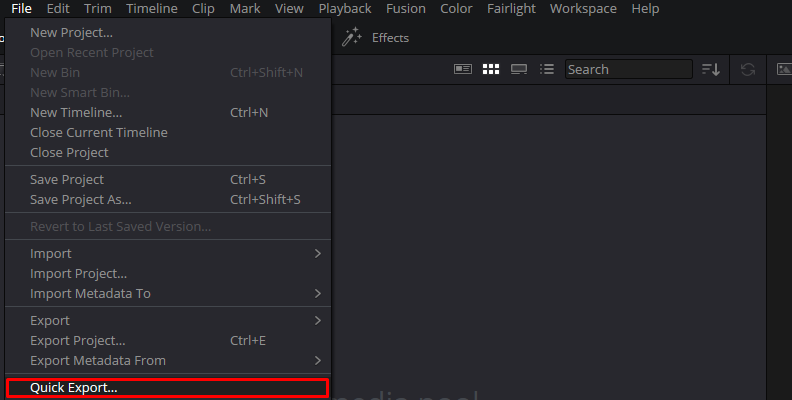
You will then see a window pop up with a number of preset options available and some recommended settings. There are also links to allow you to directly upload your footage rather than exporting it to a local storage device.
Choose the resolution you want to go with - in this case, we'll choose H.264. It's a good standard and a common setting.
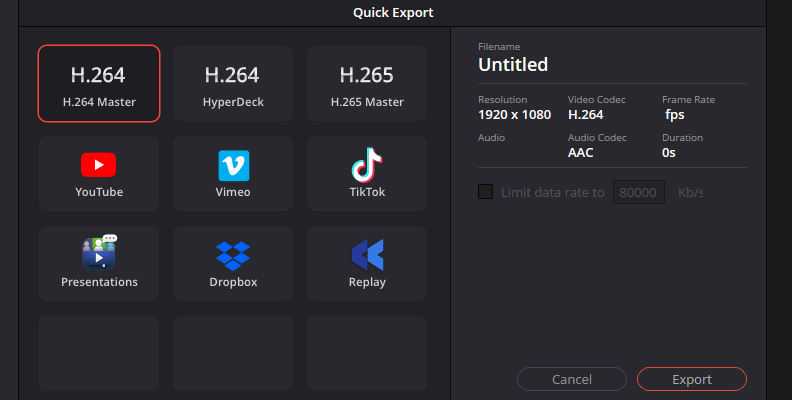
Note that both H.264 and H.265 will both compress your video and are lossy rather than lossless formats. However, good-quality video will still be maintained. The ProRes setting will maintain your video quality with minimal compression, but the resultant file size will be considerably larger.
If you click on any of the social media uploads, DaVinci Resolve will recommend the best quality settings for uploading your video clip to these sites - you can almost always go with the defaults it provides you with.
Finally, click on the Export button, and you're done.
Export with the Deliver Tab
The next method we are going to look at is exporting using the Deliver Tab. This will allow you to edit all your video settings manually so you can have complete control over the end result and all the export settings.
First, click on the Deliver icon at the bottom of the screen. It's the one that looks a bit like a rocket ship.
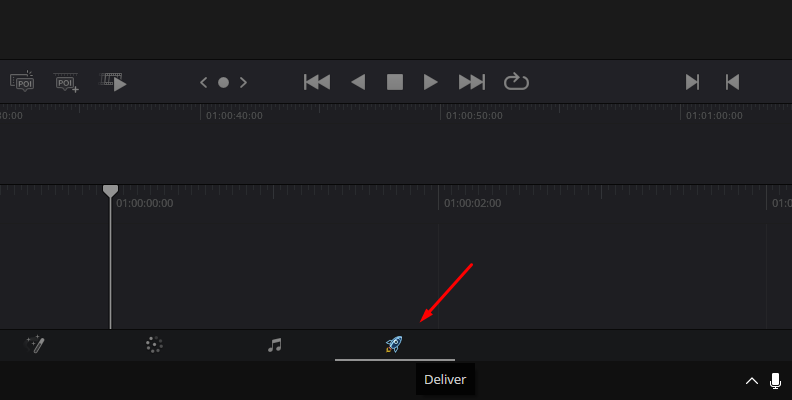
You will then see the Render Settings panel on the left-hand side of the screen.
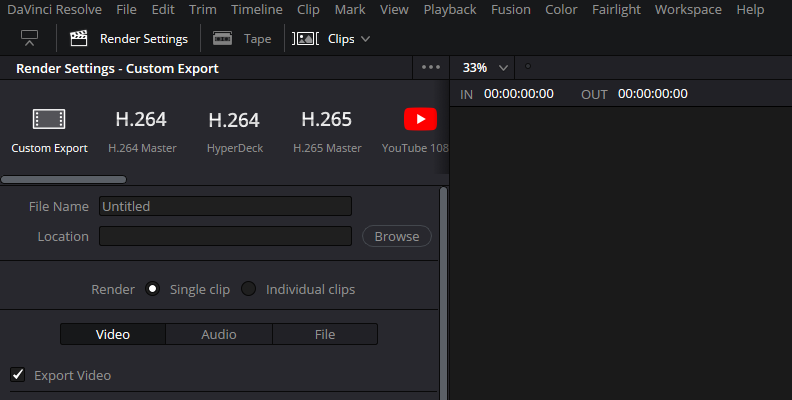
The Custom Export setting is selected by default, but you will also see the other settings that we previously saw when doing the Quick Export.
Click on the Format drop-down.
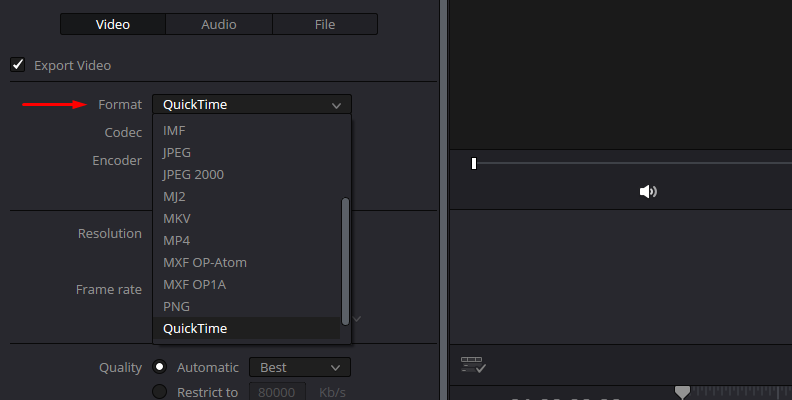
You will see a range of different video formats that you can export your video file as. Choose the file settings you require.
Here, you can also choose the resolution and frame rate.
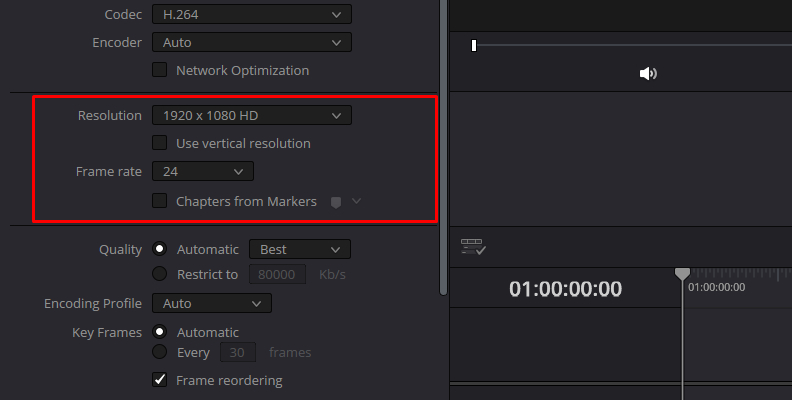
It's generally good advice not to choose a resolution greater than that of the original footage.
Quality
Next, you can adjust the Quality section. You can either leave it on automatic or change it to allow you to adjust the bitrate.
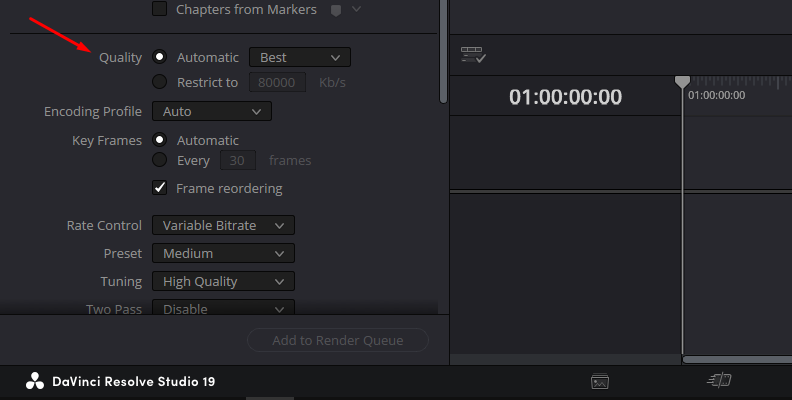
The bitrate is the amount of information that is transferred per second to export DaVinci Resolve videos. The higher the resolution and framerate are, the higher bitrate you have.
The Quality section will have a direct impact on the quality of your final video, so it's important to get this setting right. If you want to ensure that you have good-quality video, the trick is to double the framerate. So if the framerate is 20, you would choose a bitrate of 40,000, if it's 25, you would choose a bitrate of 50,000, and so on.
You can also leave this setting on automatic if you don't want to fiddle about too much.
Render Queue
Once you have done this, go to Add to Render Queue. The video you are exporting will then appear in the top right-hand corner once you've added it to the render queue.
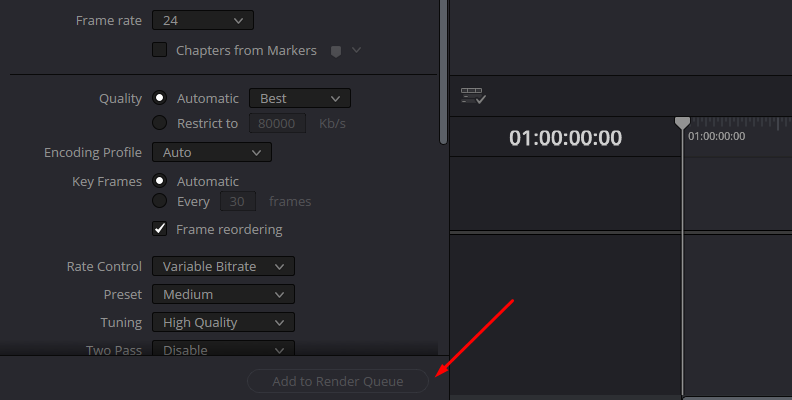
Click on Render All. Your video will now start exporting the rendered file.
And that's it! You can now export videos in DaVinci Resolve while having complete control over your settings.
Troubleshooting Render Issues in DaVinci Resolve
As with any software, sometimes things don't quite go as they should. Rendering can sometimes throw up issues, but there is plenty you can do yourself to help resolve any problems you come across.
Audio and Video Are Out of Sync
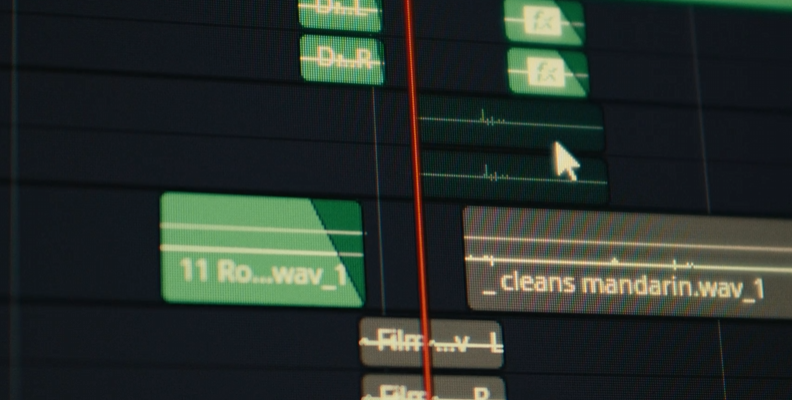
This is a simple but incredibly frustrating issue. When your audio is out of sync with the video, your project will become unwatchable. There are three things to watch out for here.
- Old Software Version: As with any piece of software you use, ensure that you are running the latest version. Bug fixes and glitches are published all the time, and ensuring you are running the latest version will also ensure you have as few issues as possible.
- Corrupt Audio: If your audio corrupts or has issues, remove it and re-import it. If this doesn't work, try changing the audio file's format and then re-import it again.
- Mismatched Frame Rate: Ensure that your project, export, and timeline settings all have the same frame rates. If they are different, it's going to cause you issues because DaVinci Resolve is unable to cope with a variable frame rate in these three options, so they need to be identical.
- If necessary, you may need to convert footage using an external piece of software such as Shutter Encoder. This is a hassle, but it's really important - if the frame rates don't match, you won't be able to resolve the issue.
Render Doesn't Complete or Fails During the Render Process
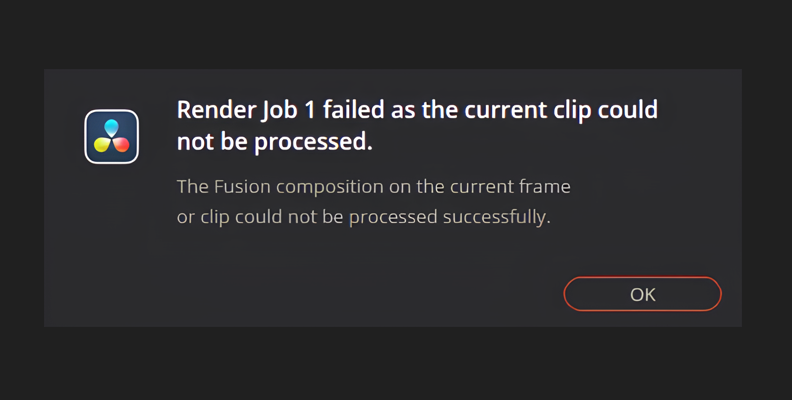
This is one of the most common issues people face when using DaVinci Resolve - the render process will stall halfway through or will simply fail at the end. There can be a few reasons for this, though corrupted media, effects, or transitions within the timeline are the most common ones.
Fixing the issue is certainly possible, though. Take note of where the render process fails. Then, find that place on your timeline.
If it occurs during effects or transitions, try removing them and running the render again. If it works, you've identified where the problem is and will need to come up with an alternative.
Another simple reason that renders can fail is a lack of storage. People often underestimate how much storage rendering will take or how large the resultant files can be, so always ensure that you have plenty of hard drive space or cloud storage, depending on where you are exporting the file to.
There's No Audio on the Exported File
This is another extremely common issue when you export videos in DaVinci Resolve. There are three main reasons for this occurring.
- Project Settings issues
- Incorrect settings for audio output
- The wrong audio file is associated with the video, or the audio track is missing altogether.
You'll need to check the audio settings to ensure all your audio files are correct. Once you have done this, go to the Deliver tab and check the output settings.
You'll need to ensure that the format you want to export your audio in is supported by an audio codec as well.
While this is unlikely to be the case with common audio file formats, if you're using something a bit more exotic, you'll need to ensure you have installed the right codec to support it.
Lastly, you will need to check your project settings and ensure they match the audio format you're trying to export.
Larger Than Expected File Sizes

File sizes can be really important when you're exporting your video, especially if you're uploading to social media rather than locally.
If your file size is much larger than you were expecting, the chances are you have a bitrate that's set too high. There's a direct correlation between bitrate and file size, so if you want to get smaller files, you will need to reduce the bitrate.
This can also have an effect on the quality of the exported video, so there is no "correct" value here - experiment and see what works best for you and how you want the finished project to look.
Artifacts From Rendering Appear in the Exported File

Artifacts can take a number of different guises but they will all cause visual issues on your exported file. These can be black screens unexpectedly appearing, color shifts where you're not expecting them, glitches on screen, and a variety of other visual issues you don't want to see.
There can be a number of reasons for these occurring, including driver issues with your graphics cards, running DaVinci Resolve on an underpowered system, and software bugs.
Format and Codec
One of the simplest ways to resolve this is to try and render in a different format or codec.
Some codecs might not be as well-supported as others and may be more likely to cause issues on less powerful hardware.
Changing the output format allows you to work around this.
Another way to try and fix this is to render your video using Optimized Media. Go to either the Media or Edit tab at the bottom of DaVinci Resolve. Select your media in the Media Pool.
Right-click the files you want to work on and choose the Generate Optimized Media option. Allow DaVinci Resolve to optimize the files, and then you can try to export them again.
And, as always, ensure any drivers you have for your graphics card are up to date. It's amazing just what a difference this can make, so check with your graphics card manufacturer to ensure you have the latest drivers installed.
Final Words
DaVinci Resolve is a very powerful video editor beloved by both amateurs and industry professionals. Understanding its intricacies is key to getting the best out of the software, and now you know how to export projects and troubleshoot any issues, your final video will look as professional as possible.
So get editing!


